

What if your veranda didn’t need to sit against the house? The ribolla detached veranda is freestanding, so you can plan its position elsewhere in the garden. Choosing the right footprint and layout, however, takes more than finding a space that looks suitable.
Start by deciding where you want the covered area and how you expect to use it. Then compare the width and projection of the listed sizes, and consider how much of the structure you want enclosed. These choices work together: the location affects the orientation, while the footprint and layout determine how the veranda fits your plan.
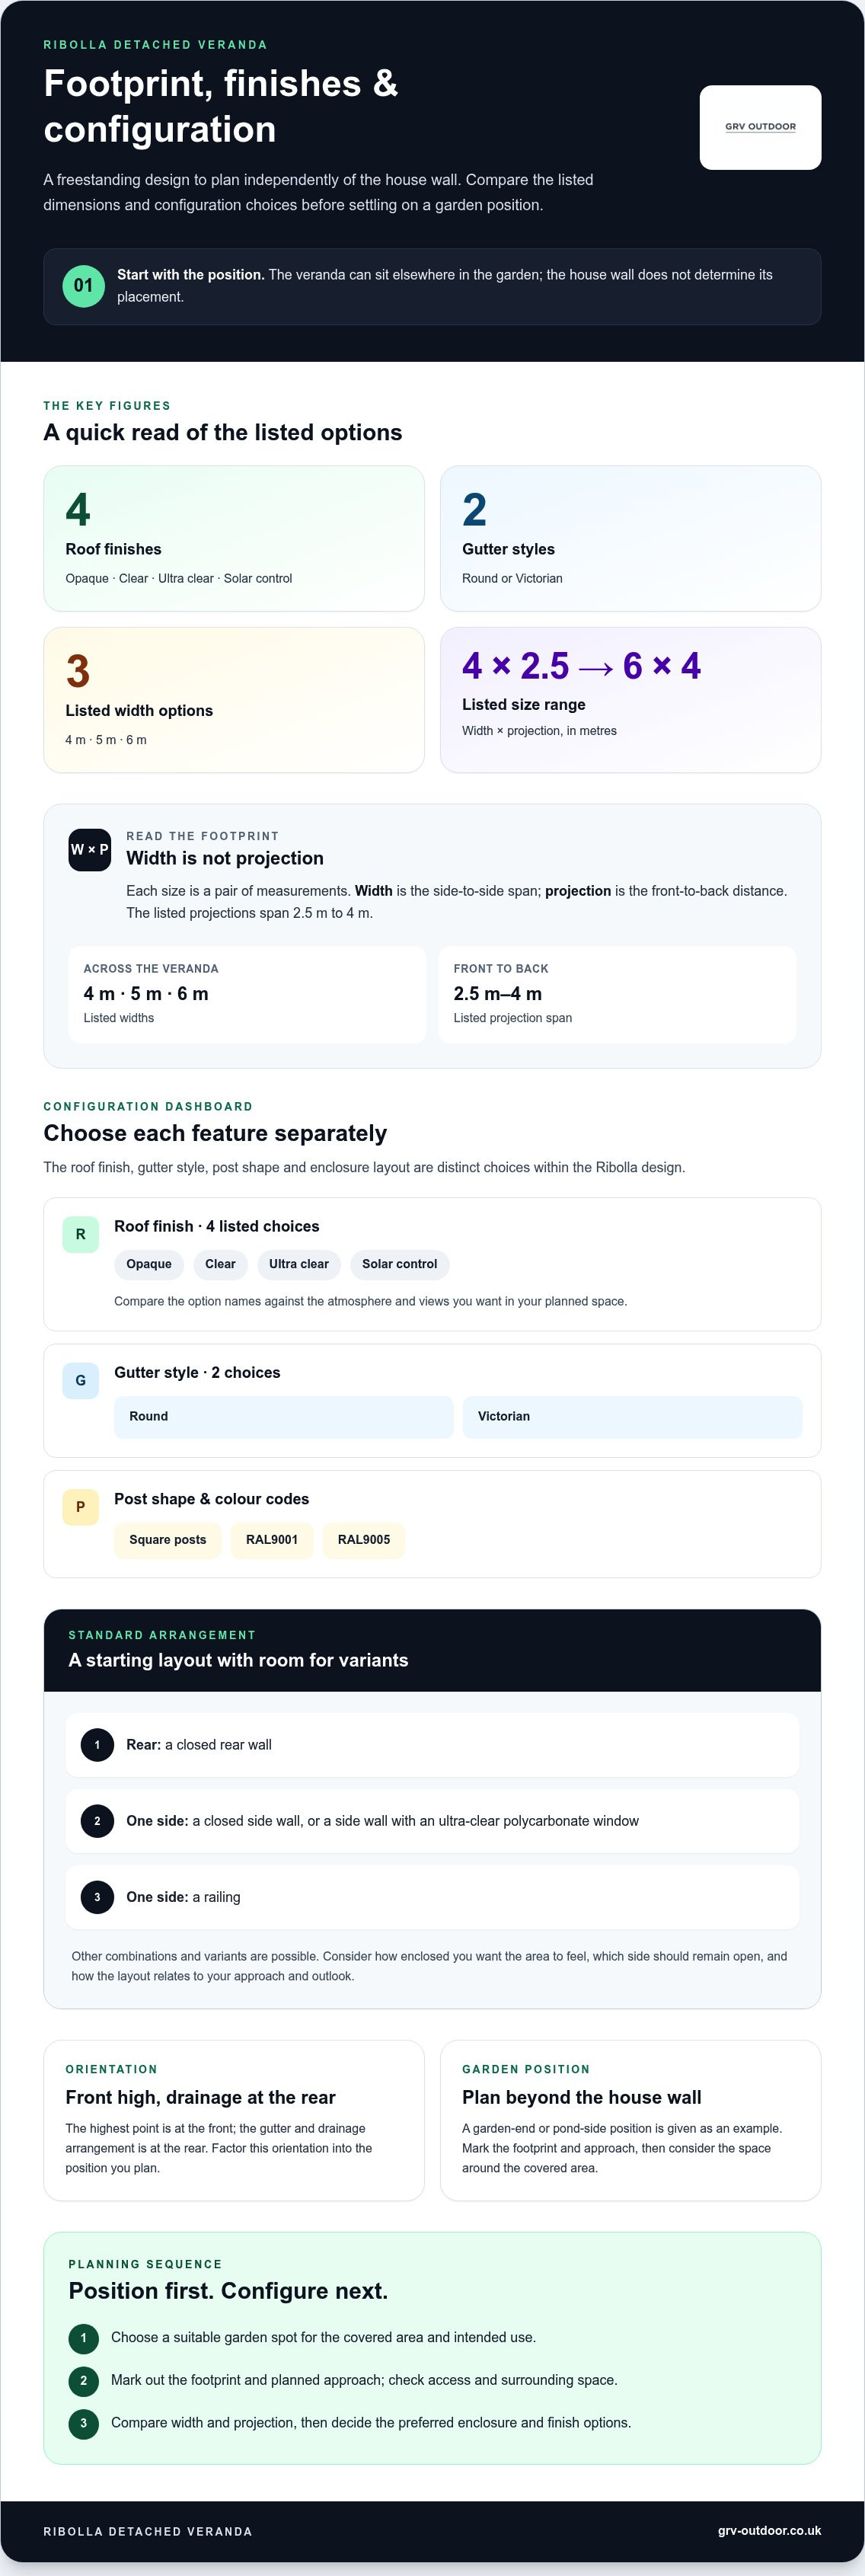
This guide covers the listed Ribolla sizes, roof and gutter options, and configuration choices. It also explains the standard arrangement, which combines a closed rear wall, a side wall and a railing, with other combinations possible. Use the practical checks below to plan your footprint and preferred level of enclosure before browsing the Ribolla options.
Key Takeaways
- Plan the freestanding Ribolla’s position independently of the house wall, in a suitable spot elsewhere in your garden.
- Compare roof finishes, square posts, and round or Victorian gutter styles as separate configuration choices.
- Read each listed size as a width and projection. Width is the side-to-side span, while projection is the front-to-back distance.
- Use the listed Ribolla detached veranda sizes to shortlist options, from 4 x 2.5 to 6 x 4.
- Mark out the footprint and planned approach first, then compare sizes and choose a layout that suits your preferred level of enclosure.
What makes the Ribolla detached veranda different from a wall-mounted design?
A Ribolla detached veranda is a freestanding structure. Unlike a wall-mounted design, it does not rely on the house wall for support or placement. You can plan a covered terrace in a suitable part of the garden rather than limiting its position to the side of the house.
Definition: A detached veranda is a veranda built as an independent structure, positioned separately from the house wall. The general history and definition of verandas provides useful architectural context, while the Ribolla’s defining feature is its independent construction.
More choice of location does not mean every spot will suit your garden. First decide where you want the covered terrace, then check how the veranda’s footprint and approach will fit there. A position may look appealing but leave too little room for the structure or make access inconvenient.
Where could a freestanding veranda sit in a garden?
The Ribolla collection description gives a garden-end or pond-side position as examples. Think about where you want the covered seating or terrace area, then consider how that spot relates to the rest of the garden. The structure can sit away from the house, but its position should still work with your layout and intended use.
Before settling on a spot, mark out the proposed footprint and look at the approach. Consider the space around the planned area and how people will move between the veranda and other parts of the garden. This helps you assess the location before choosing the Ribolla’s size or enclosure arrangement.
How does the Ribolla’s layout preserve its appearance?
The Ribolla has its highest point at the front, with the gutter and drainage arrangement at the rear. Factor this orientation into your plan: the drainage is positioned at the back rather than the front. This describes the layout, not a guarantee about drainage performance.
As you consider the position, decide which side will face the main approach or provide the most visible view. Then place the front and rear in relation to that viewpoint. The front-high profile and rear gutter arrangement help you picture how the veranda will sit in the garden.
Keep the first decision focused on location rather than trying to settle every configuration detail at once. Identify a potential spot, sketch the terrace area you want to cover, and mark the approach. Once the position is clear, compare the listed footprints and then consider the layout. This separates the question of where the veranda should sit from the later choices about dimensions and enclosure.
Which Ribolla detached veranda features can you configure?
The Ribolla offers several choices within one freestanding design. Compare the roof finish, gutter style, post shape and enclosure layout as separate decisions. This makes it easier to form an overall specification without assuming that one choice determines another.
| Feature | Listed choices or details |
|---|---|
| Roof finish | Opaque, Clear, Ultra clear and Solar control |
| Gutter style | Round or Victorian |
| Post shape | Square |
| Colour codes | RAL9001 / RAL9005 |
| Standard configuration | Closed rear wall, one closed side wall or a side wall with an ultra-clear polycarbonate window, and a railing on one side |
Which polycarbonate roof finish suits your priorities?
The listed roof finishes are Opaque, Clear, Ultra clear and Solar control. These are the option names; do not assume a particular light level or privacy effect from the label alone. Instead, decide what matters in your planned space, such as the atmosphere you want and how you want to balance light and privacy.
Consider the views from the spots you expect to use. For example, note what you can see from the seating area and how you want the roof to look from elsewhere in the garden. These preferences give you a practical basis for comparing the finishes without relying on unlisted performance figures.
What wall, railing and gutter arrangements are available?
The standard Ribolla configuration has a closed rear wall, one closed side wall or a side wall with an ultra-clear polycarbonate window, and a railing on one side; other combinations and variants are possible. This gives you a starting point while leaving room to consider a different arrangement for your intended space.
Think about how enclosed you want the area to feel and which side you want open to the garden. The rear wall, side wall and railing are separate parts of the layout, so consider their positions in relation to your preferred approach and outlook. The collection description also lists square posts and round or Victorian gutters. Compare these details alongside the roof and wall choices rather than treating configuration as one decision.
Keep a short note of your preferences: roof finish, gutter style, post shape, and the wall-and-railing arrangement. To compare the listed options, browse the Ribolla detached veranda collection and use your notes to focus your selection.
How do you compare Ribolla detached veranda sizes?
Compare each size as a footprint, not just as a pair of figures. The listed variants combine widths of 4, 5 or 6 metres with projections from 2.5 to 4 metres. Width is the side-to-side span across the veranda; projection is the front-to-back distance. Keeping the measurements separate makes it easier to judge how the structure will fit the area you have planned.
| Width | Listed projections |
|---|---|
| 4 metres | 2.5 m, 3 m, 3.5 m and 4 m |
| 5 metres | 2.5 m, 3 m and 3.5 m |
| 6 metres | 2.5 m, 3 m, 3.5 m and 4 m |
The complete listed sizes are 4 x 2.5, 4 x 3, 4 x 3.5, 4 x 4, 5 x 2.5, 5 x 3, 5 x 3.5, 6 x 2.5, 6 x 3, 6 x 3.5 and 6 x 4 metres. The first figure is the width and the second is the projection. Use the table to narrow the options by the span and depth you need. The figures are not interchangeable: each describes a different footprint.
When might a narrower or shorter listed size make sense?
The 4 x 2.5 and 4 x 3 variants are examples of the smaller listed footprints. Before browsing, mark out the area you intend to cover and note its width and depth separately. Include the seating or furniture you expect to use, so you can compare the planned arrangement with each footprint instead of relying on the size label alone.
A simple sketch gives you a consistent reference as you compare options. Draw the proposed area and indicate where seating or other furniture would sit. Avoid deciding from width alone: two verandas with the same span but different projections occupy different depths in the garden.
How should you compare the larger listed Ribolla variants?
The 5-metre and 6-metre widths provide wider choices in the collection. Compare 4 x 4, 5 x 3.5 and 6 x 4 as distinct footprints, each pairing a different width with a different projection. A wider option is not automatically the better fit. Match both dimensions to the area you planned and compare the full footprints before shortlisting.
For a practical check, draw your chosen footprint on paper or mark it out temporarily in the garden. Look at the full outline, then consider whether the seating arrangement you have in mind fits within it. This will not establish furniture capacity or clearances, but it will help you see how each listed size relates to your plan. Once you have narrowed the footprint, choose the configuration that suits it.
What should you plan before choosing a Ribolla configuration?
Plan the garden space first, then choose the Ribolla layout. This keeps the decision focused on how the veranda will fit and function in its intended position, rather than on options in isolation. Work through these steps in order:
- Identify the garden spot. Mark where you want the covered area and consider how you will approach it.
- Measure the intended footprint. Record width and projection separately. Width is the side-to-side span; projection is how far the structure extends from front to back.
- Compare the listed sizes. Match your measurements against the nominal dimensions shown for each Ribolla variant.
- Select a layout. Consider whether the rear wall, side wall and railing suit the veranda’s planned orientation.
A quick sketch makes these choices easier to review. Draw the veranda’s footprint, then add the intended seating area and approach. Use it to compare sizes and decide which side should face the main view or route into the space. For broader ideas about positioning and design, the detached garden veranda design and buying guide offers useful context.
Which measurements should you take first?
Measure the area you want covered, then compare it with the exact dimensions shown for the Ribolla variants. The size names are nominal, so use the measurements displayed for each option rather than estimating from the name. Write the width and projection in separate columns. This makes it easier to see whether a candidate size matches both sides of your planned footprint.
Include the seating area and intended approach in your sketch. You are not applying a set clearance rule; you are checking how the veranda’s outline relates to the way you expect to arrange and reach the space. If your first choice looks too wide or too deep on the plan, compare another listed variant before settling on the layout.
How can you avoid common configuration mistakes?
Do not choose by width alone. Two options with the same width can have different projections, changing the footprint you need to plan around. Check both dimensions against your measurements before focusing on a particular arrangement. Then sketch the standard rear wall, side wall and railing in the intended orientation. Consider which side will be enclosed and which will have the railing, in relation to your planned approach and outlook.
Configuration is only one part of planning. If you are also considering whether planning permission may apply to your project, read the UK veranda planning permission guide as a separate step. Once you have recorded your footprint and preferred layout, compare Ribolla detached veranda options against your plan.
Which Ribolla detached veranda should you shortlist?
Start with your planned footprint, then shortlist Ribolla variants that match both its width and projection. The examples below cover the 4-metre, 5-metre and 6-metre width options. They are comparisons, not rankings: no single size is right for every garden. Check each complete footprint against your measurements before deciding which configuration to explore.
Shortlist by footprint, not by assumption
Use the first measurement as the side-to-side width and the second as the projection, or front-to-back distance. This helps you compare variants without assuming that a wider model will necessarily suit your space better. Keep both figures together when you write down your choices.
- Ribolla detached veranda 4 x 2.5: a listed 4-metre width paired with a 2.5-metre projection.
- Ribolla detached veranda 5 x 3: a listed 5-metre width paired with a 3-metre projection.
- Ribolla detached veranda 6 x 3.5: a listed 6-metre width paired with a 3.5-metre projection.
- Ribolla detached veranda 6 x 4: a listed 6-metre width paired with a 4-metre projection.
These descriptions focus on the dimensions. Make the shortlist useful by comparing each full footprint with the area you intend to cover and the layout in your sketch. A change in either measurement changes the outline, so do not select by width alone or assume the largest option is the right one.
Browse the Ribolla collection and choose your configuration
Once you have a preferred footprint, compare it with the listed Ribolla variants. Then consider the other collection choices: polycarbonate roof finishes include Opaque, Clear, Ultra clear and Solar control; gutter options are round or Victorian, and the posts are square. The collection description also allows other combinations and variants, so consider these alongside the standard layout.
Keep your shortlist practical. Note your preferred width and projection, then record the roof finish and layout you want. This helps you compare options consistently rather than letting one feature decide the whole specification. Your final choice should reflect your garden plan and preferred arrangement, not a general claim that one variant suits everyone.
With your footprint and preferences in hand, browse the Ribolla detached veranda collection to compare the listed variants and configuration choices. Choose the option that matches your plan.
Shape your garden plan into a space of your own
Choose the spot and arrangement with the way you want to use the garden in mind. A ribolla detached veranda lets you plan beyond the house wall, while its listed sizes and configuration choices help you shape the structure around your chosen footprint. Turn your measurements and layout preferences into a clear shortlist before you browse.
As you compare, keep your priorities in view. Consider how the structure will sit within the garden and which configuration feels right for the space you are planning. A considered choice starts with your measurements and layout, not simply with the largest size or most noticeable option.
Ready to put your plan into action? Shop the Ribolla detached veranda collection and explore the listed options. Choose a veranda that fits your space and the way you want to arrange it.
Frequently Asked Questions
Does a Ribolla detached veranda need planning permission in the UK?
Not always, but whether planning permission is needed depends on the property and proposed structure. Permitted development conditions can include limits on height, position and the area covered by buildings, and restrictions may apply to listed properties or protected areas. A raised platform can also affect the position. Rules and circumstances vary, so check the requirements with your local planning authority before starting work.
Can the Ribolla detached veranda be positioned away from the house?
Yes. The Ribolla detached veranda is an independent structure, so it can be positioned separately from a house wall. The collection describes positions such as at the end of a garden or beside a pond. Before choosing a location, sketch the intended footprint and approach to see how the veranda will relate to seating and movement around the garden.
What does the Ribolla detached veranda come with as standard?
The standard arrangement includes a closed rear wall, one closed side wall or a side wall with an ultra-clear polycarbonate window, plus a railing on one side. When reviewing the layout, identify which side you want enclosed and which should remain more open. Relate those sides to your preferred view and approach to assess how the arrangement fits your garden plan.
Can I choose a Ribolla detached veranda with a different wall arrangement?
Yes. The collection description states that other combinations and variants are possible. Use the standard layout as a reference, then consider how you want the rear wall, side wall and railing oriented in the planned position. For example, sketch whether the enclosed side faces a boundary or the open side faces your seating area. This gives you a clear basis for comparing configurations.
What roof options are listed for the Ribolla detached veranda?
The listed polycarbonate roof finishes are Opaque, Clear, Ultra clear and Solar control. These are the option names, so do not infer precise light transmission or other technical performance from the wording alone. To narrow your choice, consider what matters in the space, including the balance of light and privacy you prefer. Then compare the listed finishes against those priorities.
What should I measure before choosing a Ribolla size?
Measure the width and depth of the area you want covered, and record them separately. The Ribolla size names pair the side-to-side width with the front-to-back projection, such as 5 x 3 metres. Add your intended seating and approach to a simple sketch, then compare the complete footprint with the listed variant dimensions. This helps prevent choosing an option based on only one measurement.
Does the Ribolla detached veranda have different gutter styles?
Yes. The Ribolla collection lists round and Victorian gutter options. Treat gutter style as a separate choice from roof finish and wall arrangement, so you can compare each detail without assuming one dictates another. The collection description places the gutter and drainage arrangement at the rear, with the highest point at the front. Keep that orientation in mind when picturing the veranda in its planned position.